The ultimate guide to direct sowing and growing hardy annual seeds
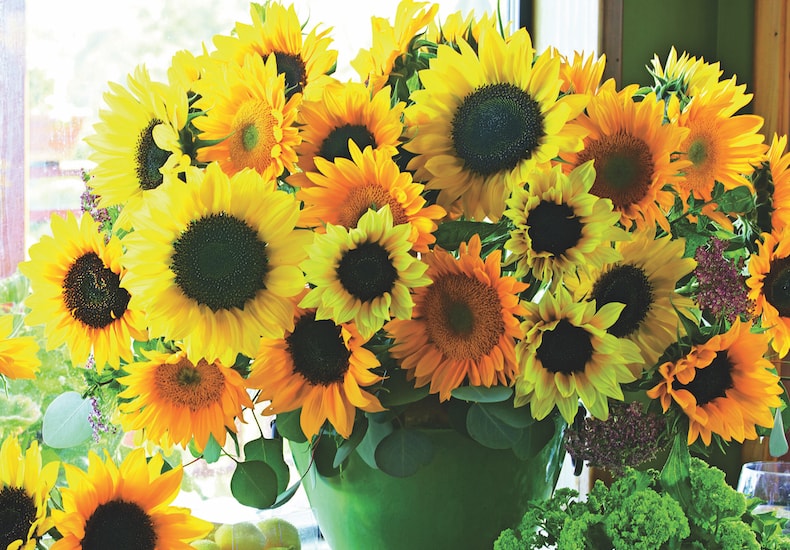
Sunflower 'Van Gogh' produces blooms of varying heights
Image: Sunflower 'Van Gogh' from T&M
Once regarded as crucial elements in any garden, hardy annuals have fallen from fashion in recent years. But as these easy-to-grow flowers enjoy something of a recent revival, trained horticulturist Graham Rice shares his tried-and-tested direct sowing and growing techniques. Here’s everything you need to know about using hardy annual flowers to create a sensational summer show.
Browse our full collection of hardy annual seeds to find something for every garden.
What is a hardy annual?
The definition of a hardy annual is simple enough. It's a plant that goes through its entire life-cycle in one season and which can be sown outside in the open garden in spring where it is to flower. In many areas this carries with it the implication that it can happily survive the spring frosts as a seedling.
But it has to be said at the outset that in practice, this definition is a narrow one. In nature, some annuals germinate in late summer or early autumn and overwinter as young plants before surging ahead in spring. Many plants which have become adapted as weeds of cornfields like cornflowers (Centaurea cyanus) fit into this category. They germinate after harvest and flower and seed in summer, shedding at least some of their seed soon enough not to get collected with the crop. The definition can be extended to plants which are actually perennial in habit, but which flower quite happily in their first year when sown outside. It also describes plants which are frost tender but flower so quickly from seed that, even in colder areas, they can be sown outside after the last frost and still give a good display.
The best site and soil for hardy annuals
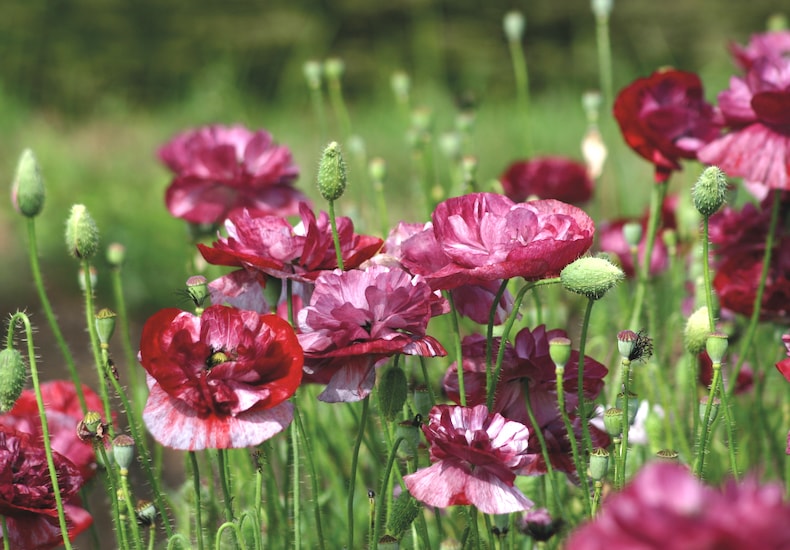
Poppy 'Burgundy Bigalow' provides quick and easy summer colour for a cottage garden scheme
Image: Poppy 'Burgundy Bigalow' from T&M
Many's the gardening book that has recommended growing hardy annuals in the hottest sun and the poorest, driest possible soil. There is the hint of good reason for this, but it needs dramatic adaptations for the garden. In nature, many annuals grow in situations where there’s only a short time for them to grow and produce seed. This may be because they grow in semi-arid regions where the soil is only moist following brief seasonal rains and the plants must grow quickly to make the most of this temporary moisture before the sun dries the soil. Or a speedy life cycle may be necessary because the plants grow in unstable soil such as a scree, windswept areas or soil frequently disturbed by animals.
In these situations, annuals grow quickly and flower with great flamboyancy, but often on small plants and for only a short time. The soil is poor and dry so there’s a pressure for the whole cycle to be over quickly.
In the garden this is not what is required. Gardeners need their plants to flower for long periods and preferably on plants a little more bushy than the single stems so often seen in the wild. So although annuals will grow and flower in poor, dry conditions, if you want a good display in the garden, the soil should be rather better.
Sun is necessary for the best display, although most hardy annuals will do well enough in a site that’s only in the sun for half a day. Heavy soils are the least suitable for hardy annuals though they can be much improved by the addition of organic matter and especially by forking in sharp sand or grit to improve the drainage. Good drainage is one thing that really does help most hardy plants. But this should not be taken to such excess that they are constantly thirsty. Good drainage is important - if the soil is also moisture retentive then growth and flowering will last all the longer. Sandy and gravelly soils will be much improved for annuals by the addition of garden compost.
Hardy annuals appreciate a little more than starvation rations too. Personally I find that on most soils a handful of a general balanced fertiliser such as Growmore (7-7-7) raked in before sowing is quite enough as long as there is some organic matter in the soil. Some gardeners recommend an application of superphosphate at sowing time, and a general fertiliser later, but I haven’t found this necessary.
The best direct sowing technique for hardy annuals
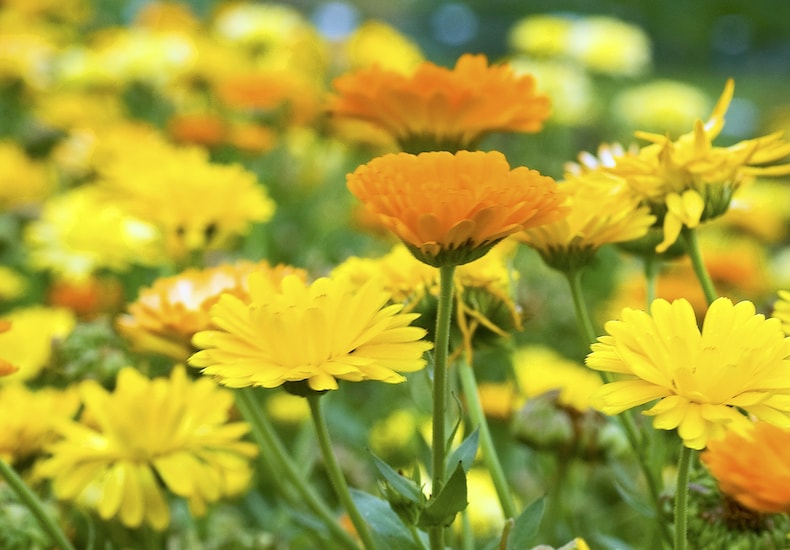
Calendula 'Fiesta Gitana Mixed' is a superb bedding mixture
Image: Calendula officinalis 'Fiesta Gitana Mixed' from T&M
The direct sowing technique for hardy annuals is simple enough, although there are some variations which depend on personal preference.
The site should be forked over lightly, trodden again and then the fertiliser dressing raked in. At this stage opinions diverge, but most seem to favour sowing the seed in rows rather than broadcasting it. So, first check the seed packet for advice on sowing depth and spacing. If your seed comes from a seed exchange or a friend, then use your wisdom and your reference books to help. As a guide, sow seeds at about twice or three times their own depth - take no notice of the precise recommendations sometimes given in terms of fractions of an inch! We all know that such precision is impossible. Space the rows out at about half the eventual height of the plants.
Rake the soil to a fine tilth and then, using the point of a cane, make a shallow drill of the depth required. If you're sowing a number of hardy annuals in a large group, orientate the rows of the different varieties at contrasting angles to each other rather than parallel to avoid too much regimentallity.
When it comes to the actual sowing of the seed, there are many ways of going about it. I feel that the important thing is to be able to see the seed falling on to the soil so that it can be sown thinly enough, but not too thinly.
Perhaps the easiest way of doing this is to cut the top off the packet with a pair of scissors to leave a clean edge. A crease is then made half way along one side of the cut top and the edges of the packet held between the thumb and second finger. The packet can then be tipped slightly so that the seed runs into the crease and the packet tapped gently with the first finger to dislodge the seed.
We are always enjoined to sow thinly and this is very wise. But a balance must be struck depending on the number of seeds available, the viability of the seed and the quality of the soil tilth. Some packets, especially those of newer varieties, may not contain many seeds. In that case if the soil is good the seed of many plants can be sown very thinly, say at 1 inch (2.5cm) intervals, but if the soil is less good, sowing at a closer spacing in just one row may be preferable. Later, seedlings can be transplanted at their final spacings into the other rows. Seed from seed exchanges and from your own garden may not be of the same high germination quality that usually comes from the seed companies, so sowing more thickly may be advisable. If it’s not possible to work the soil into a fine tilth, this too may necessitate sowing less thinly.
Covering the seed is a simple matter. The back of the rake can be used to draw a little soil over the drills and this can then be tamped down gently by the flat of the rake. If you have a problem with sparrows or other birds taking dust baths in the soil after sowing, stretch some black cotton thread over the sown area or place some twiggy brushwood over the bed to keep the birds off.
Thinning out your hardy annual seedlings
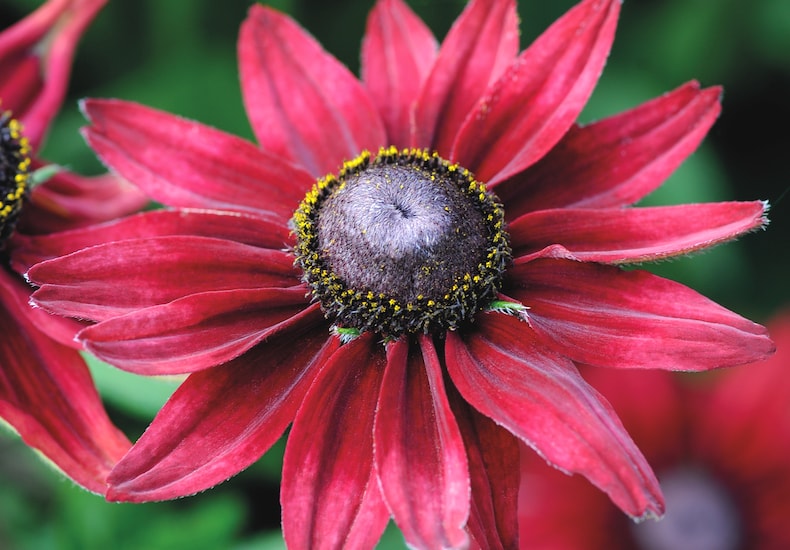
Rudbeckia hirta 'Cherry Brandy' is popular for its outstanding garden performance
Image: Rudbeckia hirta 'Cherry Brandy' from T&M
The speed at which the seedlings come through depends on the weather. If the tilth was well prepared and you have used high quality seed, you’ll probably find germination is fairly even. Otherwise it may be a little erratic. The seed packet will usually give you a recommended final spacing and at the first thinning you should not remove all the seedlings that will eventually be unwanted. First of all, thin to give an inch (2.5cm) between seedlings, then to half the eventual spacing as the seedlings grow, and then eventually to the final spacing. That way, if anything goes wrong there will always be a few spares.
Thinning without disturbing the seedlings you wish to retain can be difficult. The first thinning when the seedlings are small can usually be done simply by pulling the seedlings sideways away from the row. They should come out quite easily. If the soil is dry, water the drills well before starting. At the next thinning use the following technique. Place the first and second fingers closely on either side of the seedling you wish to retain and press firmly on the soil. This will keep the seedling in place while you remove the unwanted neighbouring seedlings with the other hand. If you wish to transplant seedlings, use a narrow trowel to remove seedlings individually with a little soil on their roots. Plant them at once and water them in promptly.
Supporting hardy annuals in the garden
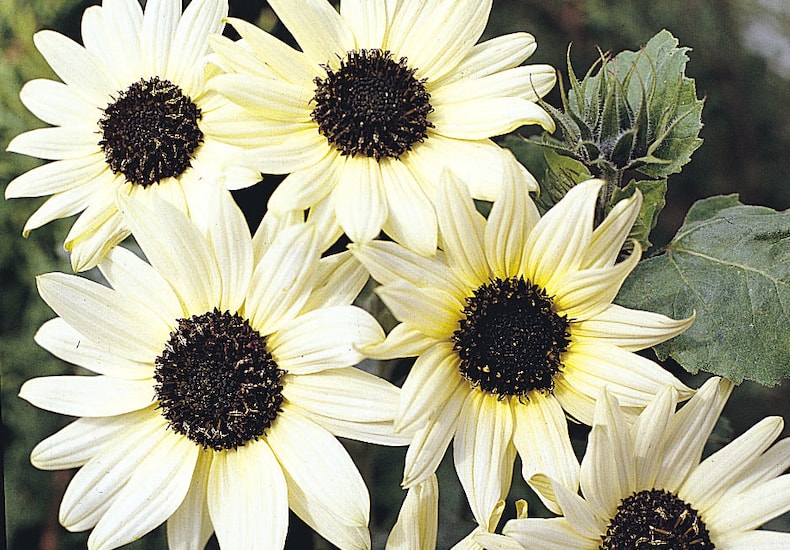
Growing to 120cm tall, these 'Italian White' sunflowers benefit froma little support
Image: Sunflower 'Italian White' from T&M
Many hardy annuals need support, especially in garden soil which is a little bit richer than the soil they find in their wild homes. This encourages them to grow a little taller and a little softer than they would normally - as well as flowering better. There are a number of different ways of supporting the plants.
The simplest is probably to use brushwood to support the plants that experience tells you are likely to flop. In different areas different materials are available, but hazel (Corylus avellana) is especially good as it grows in flat, fan-like sprays making ideal supporting material. But although hazel is the best natural support, birch or whatever other twiggy material is available is good too. Choose twigs which when pushed firmly into the ground reach a height of about two-thirds of the eventual height of the plants concerned. Place it around the group when the plants are still quite small (so that the plants never flop) and secure it by running string all the way round, looping it around the main branches as you go. A few extra pieces in the middle of larger groups can be useful. As the plants get larger, side branches will grow through the twigs and hide them.
An easy alternative is bamboo canes and, although less attractive, they are very serviceable. Put a cane in at each corner of the group and run strings around and across. Use strings at two heights for taller plants.
Another method which I've found to work well for beds and borders given over entirely to hardy annuals is to use netting. Immediately after sowing all the groups knock in stakes at the corners of the bed and at 2ft (60cm) intervals in between. Then cover the bed in wide mesh plastic netting, the sort used to support peas and beans is ideal. Slide it over the posts and lay it on the ground where it will prevent birds creating havoc.
When the plants come through, lift the netting slightly and in stages to a height of about 9 inches (23cm) so that the plants can grow through. The same idea can be adapted for individual groups by using dahlia stakes and smaller pieces of netting.
Weeding your hardy annuals
By sowing your hardy annual seed in rows it becomes easy to distinguish the weeds from the emerging seedlings. If the rows are far enough apart a hoe will deal with the young weeds, otherwise hand weeding will be required until the seedlings are big enough to smother.
Weeds growing in the rows with the seedlings can be removed in the same way as unwanted seedlings are removed when thinning out, carefully protecting the seedlings you want to retain and re-firming any that are disturbed.
How to protect annual flowers from pests and diseases
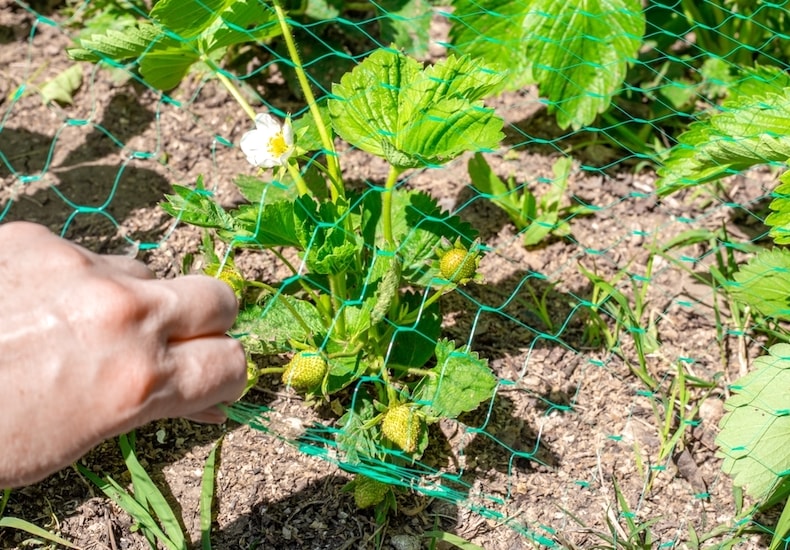
Use netting to cover the soil and keep birds off your seedlings
Image: Shutterstock
Fortunately the number of pests and diseases that attack hardy annuals is fairly limited but there are a few which can cause problems, and one or two can be very troublesome:
- Aphids - Aphids come in a huge range of colours and can build up quickly in warm conditions. Spraying with a suitable insecticide will kill them within half an hour but will not harm any beneficial insects.
- Birds - Small birds can cause a problem by dust-bathing in the fine soil shortly after the seed is sown. Using netting to keep them off the soil will certainly do the trick, otherwise use black cotton. But beware of cotton thread with a nylon core which is very strong and could injure birds if they become entangled.
- Botrytis - This can affect the tightly packed petals of some double flowers in which case the damaged flowers should be removed at once and the plants sprayed with a suitable fungicide.
- Capsids - Small, uneven, yellow-edged holes appear in the shoot tips of a wide variety of plants. The tips can be pinched out or you can spray with a suitable insecticide.
- Caterpillars - Occasionally troublesome, picking them off often gives adequate control. Otherwise plants can be sprayed with an insecticide.
- Cats - Unfortunately being a cat lover won't stop them digging holes in your seed beds. The netting or string described for birds should keep them off.
- Leaf miner - Small whitish tunnels appear in the leaf surfaces of members of the daisy family. Pick them off when first they're seen, or spray with an insecticide.
- Mildew - Powdery mildew is the one problem that is almost certain to cause problems if you grow Larkspur, Cornflower, Calendula and Verbena, especially in a hot, dry season. It can be devastating but some varieties are more resistant than others. In bad years they all suffer.
- Rust - A problem with Antirrhinums and sometimes with Lavatera. Spraying with a suitable fungicide helps, otherwise the only answer is the bonfire.
- Slugs - Can devastate young seedlings so it’s wise to take precautions. Clearing nearby weeds and rough vegetation will remove their daytime hiding places. Use traps of stale beer or milk, liquid preparations to water on the soil, or pellets. Choose the blue pellets, but make sure they contain an additive to stop pets and wildlife eating them, and use them sparingly.
Dead-heading annual flowers for a longer display
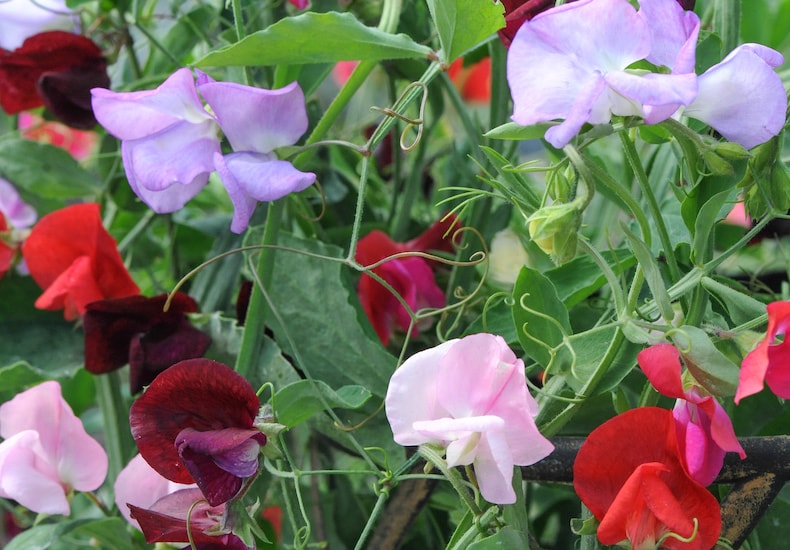
For an endless supply of cut flowers you need to pick and deadhead sweet peas regularly
Image: Sweet Pea 'Antique Fantasy Mixed' from T&M
If there's one thing that keeps hardy annuals flowering well it's regular dead-heading. If the dead flowers are removed as they fade, more and more flowers will appear.
Some quick-flowering plants like Phacelia and the modern mimulus hybrids can be rejuvenated when they fade by cutting back the plants to within 3 inches (7.5cm) of ground level. But it's essential that this be accompanied by regular watering until they start to grow away again. It also pays to put some liquid feed in the first soaking they get after cutting them back. If they dry out after getting cut back you will be guaranteed bare soil where otherwise you'd have another flush of flowers.
How to water and feed your annuals
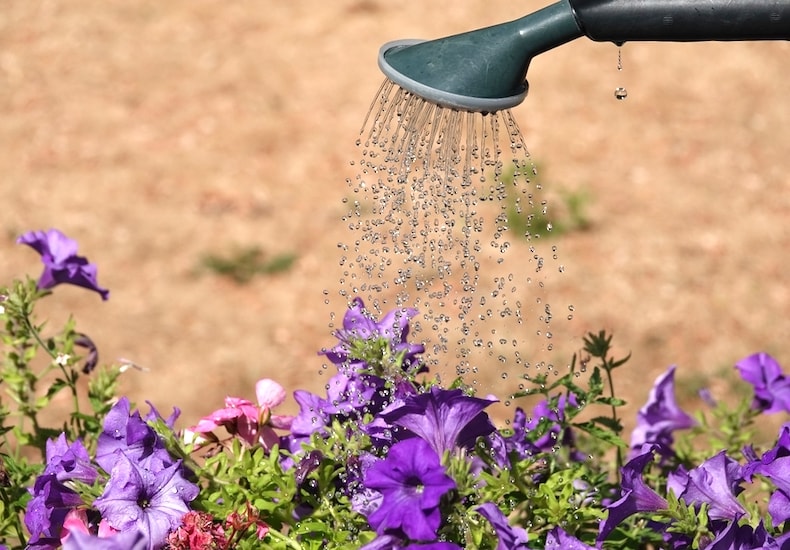
Once your flowers are well established, they should only need watering in dry spells
Image: Shutterstock
If your hardy annual seeds are sown reasonably early in the spring, they should be able to establish a deep root before the driest weather and will probably only need watering in very dry spells. However, even when the soil is only moderately dry, watering can help to extend the flowering period.
Two things are important about watering. The first is that the plants must be adequately supported otherwise the irrigation spray will simply beat the plants down and your border will be ruined. The other important thing is that you follow the usual rule and give them a really good soak. Simply dribbling on a little bit will do more harm than good.
Watering may also be needed if you transplant any seedlings when you thin them out. But once they are growing away they can often be left to take their chances (except in very hot areas).
Feeding is not an important feature of the care of hardy annuals as long as the soil is at least reasonably well prepared in the first place. Apart from raking in a general fertiliser before sowing, they should be happy without further feeding. The exception is that plants growing in containers may need liquid feeding as the soil becomes full of roots. Especially if you’ve packed a lot of plants in.
Summer and autumn sowing hardy annuals
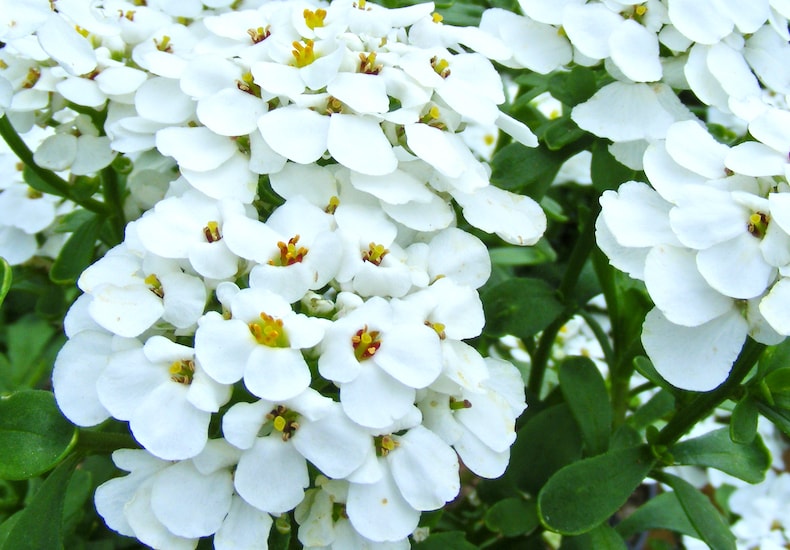
Beautiful for the border or cutting, Candytuft seeds can be sown in spring and summer
Image: Candytuft 'Hyacinth Flowered' from T&M
Some hardy annuals grow reasonably quickly and can be sown rather later than the spring season which is normally recommended. They will then give you a display which is just approaching its best at a time when spring sown plants may be past their peak.
In the UK this means sowing in the second half of July and the timing can be crucial. So it pays to experiment a little with the timing if you're not sure. Plants which have been found suitable for this approach include:
- Californian poppy (Eschscholtzia californica)
- Dwarf cornflowers (Centaurea cyaneus)
- Dwarf larkspur (Delphinium ajacis)
- Dimorphotheca (Dimorphotheca aurantiaca)
- Godetia (Godetia grandiflora)
- Candytuft (Iberis amara)
- Linaria (Linaria maroccana)
- Baby blue eyes (Nemophila menziesii)
Again some experimentation would probably reveal plenty of other suitable plants and of course quick growing annuals which are usually started off indoors in warmth earlier in the year, like African and French marigolds, will respond well to this treatment.
There are some annuals, especially those which originate as cornfield weeds, which germinate in the autumn and overwinter as young plants before flowering early the following summer. These are known as winter annuals. Cornflower is a prime example. This tendency can be enhanced in the garden by sowing in late summer and early autumn.
The plants which overwinter tend to flower before their spring sown counterparts and also to produce larger plants which obviously produce more flowers. Any of the tougher annuals can be tried in this way, but I would especially suggest:
- Pheasant's eye (Adonis aestivalis)
- Cornflower (Centaurea cyaneus)
- Godetia
- Sweet pea (Lathyrus odoratus)
- Fried egg plant (Limnanthes douglasii)
- Love-in-a-mist (Nigella damascena)
- Baby blue eyes (Nemophila menziesii)
Some annuals will suffer in especially cold or damp winters and two precautions can be taken to minimise losses. Firstly, choose a sunny and warm spot in which to sow annuals for over-wintering and secondly, improve the soil drainage by forking in grit, especially on clay soils.
One thing worth remembering about sowing in summer and early autumn is that the soil may be very dry at sowing time. Rather than soak the whole area to be sown, the best plan is to draw the drills a little deeper than you normally would and then to dribble some water into the drills from the spout of the watering can. The seeds will then have some damp soil in which to germinate and the dampness will penetrate some way beneath the drill so providing a water reserve.
Tried and tested varieties of hardy annuals
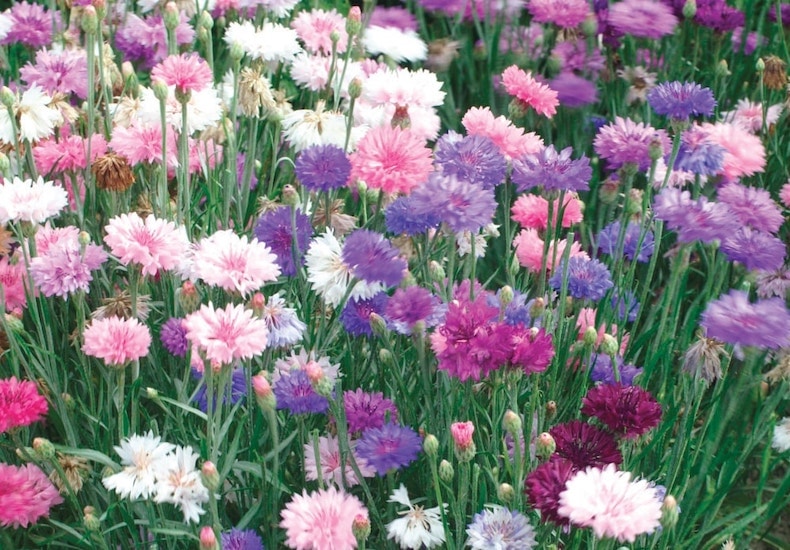
Cornflower 'Polka Dot Mixed' blends some of the loveliest shades in an easy-to-grow mix
Image: Cornflower'Polka Dot Mixed' from T&M
- Calendula officinalis (English Marigold) - From tall cut flowers like ‘Indian Prince’, to dwarf edgers like ‘Fiesta Gitana’ in hot shades of orange and yellow.
- Centaurea cyaneus (Cornflower) - Tall and waving or short and squat, the colours vary from deep purple through rich and pale blues to lilac, pink and white. ‘Polka Dot’ is a good medium sized variety in mixed colours.
- Chrysanthemum carinatum - Very showy plants for the back of the border in a huge range of colours and bicolours. ‘Court Jesters’ is probably the best.
- Clarkia elegans - In single colours or mixtures of double flowers this is easy to raise in all soils.
- Delphinium ajacis - Again, a variety of sizes, the double hyacinth flowered types, tall or short, are the most popular.
- Godetia grandiflora - Large open, upward facing cups in various reds and pinks plus white.
- Iberis (Candytuft)
We hope we’ve inspired you to create your own beautiful displays of annual flowers. For more articles and advice, head over to our helpful hub page to find everything you need to know about growing annual flowers.
Graham Rice is author of A Handbook of Annuals and Bedding Plants published by Christopher Helm (UK) and Timber Press (USA).
Source of article
Growing From Seed - Spring 1988 Vol. 2 Number 2
© The Seed Raising Journal from Thompson & Morgan
Sign Up For Exclusive Special Offers


© 2024 Thompson & Morgan. All rights reserved. A division of Branded Garden Products Limited.